
Messy bun hairstyle is the easy updo that looks like you spent ten minutes on it, even when it only took two, and it is the one style that works for a school run, a work meeting, a wedding, and a lazy Sunday without changing a thing except how loose you wear it. Here are 28 original ideas, each with who it suits, how to build it, and how to keep it in place all day, so you can pick the right messy bun for your hair length, your hair type, and your plans.
Messy bun hairstyle works so well because it turns the hair you already have into a finished look in minutes, and it does not ask for perfect sections, a flat iron, or a salon visit to look good. You gather the hair, twist it loosely, pin it where it wants to sit, and pull out a few soft pieces around the face, and the result looks soft, relaxed, and intentional, because the looseness is the whole point. It suits straight, wavy, and curly hair, fine hair that needs volume at the crown, and thick hair that needs weight lifted off the neck, and it works on short hair with a few pins, on medium hair with one elastic, and on long hair with a twist and a wrap. It also flatters every face shape, because you can pull out tendrils to soften a square jaw, leave the front smooth to lengthen a round face, or pile the bun high to add height to a long face. It photographs well in daylight and at events, because the soft, undone texture catches the light, and it is a style that 27 Gorgeous Honey Blonde Hair Color for Long Hair for a Fresh Look readers love to pair with warm, dimensional colour, because the loose bun shows off the lighter pieces at the crown and the ends.
A messy bun is not a failed neat bun, and that is the first thing to understand, because a good messy bun is built loose on purpose, with texture first and pins second, so it holds without looking stiff. Start with hair that has some grip, which means day-old hair, dry shampoo at the roots, or a little sea salt spray through the lengths, because clean, slippery hair slides out of pins and falls flat. Gather the hair where you want the bun to sit, high on the crown for a playful look, at the middle of the head for an everyday look, or low at the nape for a soft, elegant look, and secure it loosely so the bun keeps its air. Then pull the bun apart gently with your fingers, tug a few pieces free around the face and the nape, and finish with a light hairspray, because the pulled-out pieces are what make the bun look messy in the right way. It is a style that Pinterest readers keep saving when they plan a quick morning look, and it is one of the most searched updos for a simple reason: it takes two minutes, it needs almost no tools, and it looks good on almost everyone.
Key Takeaways
- Start with hair that has grip — day-old hair, dry shampoo at the roots, or sea salt spray — because clean, slippery hair slides out of a messy bun.
- Place the bun where you want the mood: high on the crown for playful, mid-head for everyday, low at the nape for elegant and soft.
- Build the bun loose first and pin second, then pull it apart gently with your fingers and free a few soft pieces around the face.
- Use a soft elastic, U-pins, and a light hairspray — tight elastics and heavy gel make a messy bun look stiff and flat.
- Match the bun to your hair type: backcomb fine hair at the crown for volume, and split thick hair into two sections so the bun is not too heavy.
- A messy bun takes two to five minutes, suits straight, wavy, and curly hair, and works for work, weddings, the gym, and second-day hair.
1. Classic High Messy Bun

The classic high messy bun is the look most women picture when they think of a messy bun, because it sits high on the crown, it lifts the whole face, and it turns an ordinary ponytail into a style that looks finished in under two minutes. You gather the hair into a high ponytail without smoothing it perfectly, twist the length loosely around its own base, and pin it where it falls, then pull the bun apart gently so it looks full and soft instead of tight and small. This suits medium and long hair best, because the length gives the bun its size, and it works for straight, wavy, and curly hair, because the twist holds the same way on every texture. It flatters round and square faces most, because the height at the crown lengthens the face and the loose pieces soften the jaw, and it is the bun to choose for a busy morning, because it needs one elastic, two or three pins, and no mirror at all once you know the motion. The grow-out does not matter here, because a messy bun hides new growth, and it is the easiest way to look put together on a day when your hair will not behave.
To build it, flip your head forward and gather the hair at the crown, then secure it with a soft elastic, not a tight one, so the ponytail keeps some air at the roots. Twist the ponytail loosely, wrap it around the base, and tuck the ends under with two or three U-pins, then pull the bun outward with your fingers until it looks as full as you want. Free two thin pieces at the front, one on each side, and let them fall past the cheekbones, because those tendrils are what make the bun look soft instead of scraped back. Finish with a light hairspray from arm’s length, and check the back in a mirror once, because a high bun can lean to one side if the ponytail started off centre. If the bun feels small, backcomb the ponytail lightly before you twist it, because the backcombing adds air inside the bun. This is the bun to learn first, because every other messy bun in this guide is a change of height, a change of texture, or a change of detail on this same simple base. Once you can build this bun without a mirror, every other bun in the guide takes less than a minute to learn.
2. Low Messy Bun at the Nape

The low messy bun at the nape is the most elegant messy bun in this guide, because it sits low and soft at the back of the neck, and it makes the whole look feel calm, grown-up, and polished without losing the relaxed feeling that makes a messy bun work. You gather the hair low, twist it loosely, and pin it just above the nape, then pull a few pieces free around the ears and the neck, so the bun looks soft from the front and full from the back. This suits thick and long hair best, because the weight sits low and does not pull at the crown, and it works for straight and wavy hair, because the low placement shows the smooth fall of the hair from the part to the bun. It flatters long and oval faces most, because the low bun does not add height, and the soft pieces around the face balance the length of the face. It is the bun to choose for work, for dinner, and for formal days, because it looks neat from the front and relaxed from behind, and it pairs well with earrings, a scarf, or a collared shirt, because the neck stays clear and the bun stays out of the way.
To build it, part the hair in the middle or on the side, smooth the top lightly with your hands, and gather the hair at the nape into a loose ponytail. Twist the ponytail once or twice, coil it around its own base, and pin it with U-pins, then pull the coil outward gently so it looks soft and round instead of flat and tight. Free a few fine pieces at the temples and let them fall past the ears, because those pieces keep the low bun from looking severe, and tug the hair at the crown very lightly for a little lift. Finish with a light hairspray, and check the sides in a mirror, because a low bun shows every stray piece from the front. If your hair is very thick, split the ponytail into two sections and twist each one before you coil them together, because two smaller twists sit flatter than one heavy coil. This is the bun to choose when you want to look polished without looking done up, and it is the one that works from a morning meeting to an evening dinner with no change at all. A low bun also keeps the hair off a collared shirt, which is one more reason it suits office days.
3. Messy Top Knot

The messy top knot is the boldest messy bun in this guide, because it sits right at the very top of the head, it lifts the face, it clears the neck completely, and it turns a quick updo into a statement that looks cool, confident, and a little bit playful. You gather the hair straight up to the top of the crown, twist it tightly enough to hold, and wrap it into a knot, then pull the knot apart until it looks big and soft, because the size of the knot is what makes this style different from a small high bun. This suits long and thick hair best, because the length makes the knot full, and it works for straight, wavy, and curly hair, because the twist holds the same way on every texture once the hair has some grip. It flatters round and heart-shaped faces most, because the height on top lengthens the face and the loose pieces soften the forehead, and it is the bun to choose for hot days, for workouts, for festivals, and for days when you want your hair completely off your face and neck. It is also the bun that photographs best from the front, because the knot frames the face like a crown.
To build it, flip your head forward, gather the hair at the very top of the crown, and secure it with a strong elastic, because the knot sits high and needs a firm base. Twist the ponytail, wrap it around the base, and pin the ends underneath with U-pins, then pull the knot outward in small sections until it looks as big as you want, because the pulling is what turns a tight knot into a messy one. Free two thin tendrils at the front and let them fall past the temples, and tug the hair at the crown lightly for a little lift. Finish with a firm hairspray, because a top knot sits high and needs more hold than a low bun, and check the back once, because the knot can lean if the ponytail started off centre. If your hair is fine, backcomb the ponytail before you twist it, and use a small donut maker inside the knot for extra size. This is the bun to choose when you want height, drama, and a completely clear neck, and it is the one that stays in place through a long, hot day. Wear it with sunglasses and a simple top on hot days, because the high knot and the clear neck do all the work.
4. Half-Up Messy Bun

The half-up messy bun is the best of both worlds, because it pulls the top half of the hair into a soft, loose bun and leaves the rest of the length down, so you get the lift and the clear face of an updo with the softness and movement of loose hair. You section off the top half of the hair from temple to temple, gather it at the crown, and twist it into a small, loose bun, then let the bottom half fall free over the shoulders. This suits medium and long hair best, because the loose length is part of the look, and it works for straight, wavy, and curly hair, because the bun holds the same way on every texture while the loose hair shows its own natural movement. It flatters round and square faces most, because the bun on top adds height and the loose hair softens the jaw, and it is the bun to choose for a casual day, for a date, or for a photo, because it looks relaxed and pretty from every angle. It is also the easiest messy bun to fix during the day, because you can take it down, shake the top section out, and put it back up in under a minute.
To build it, part the hair where you like it, then take the top section from one temple to the other and gather it at the crown. Twist the section loosely, wrap it into a small bun, and pin it with two U-pins, then pull the bun apart gently so it looks soft and full instead of tight and small. Free a few thin pieces at the front and let them fall past the cheekbones, because those tendrils frame the face and keep the style soft. Brush the loose length lightly so it falls smooth, and finish with a light hairspray on the bun only, because the loose hair does not need hold. If your hair is fine, backcomb the top section lightly before you gather it, because the backcombing gives the small bun more size. If your hair is thick, use a strong elastic at the base, because the bun carries the weight of the top section all day. This is the bun to choose when you cannot decide between up and down, because it gives you both at once. It also works well on second-day hair, because the top section has grip and the loose length hides any flatness at the roots.
5. Messy Bun with Face-Framing Tendrils
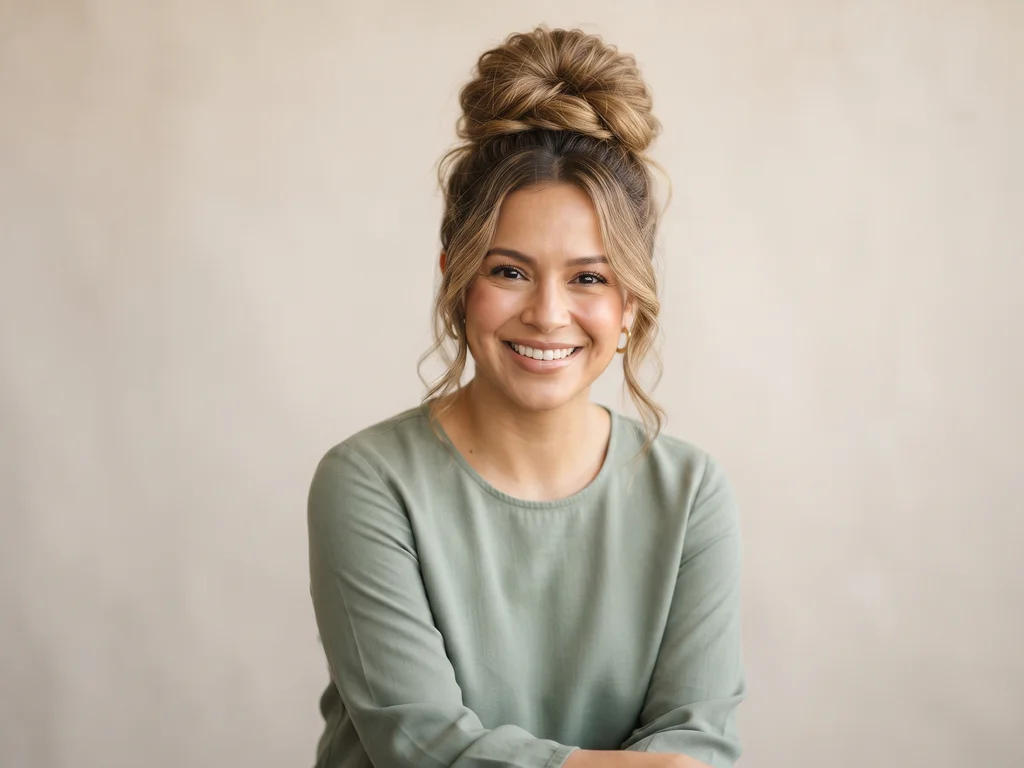
The messy bun with face-framing tendrils is the softest messy bun in this guide, because two thin pieces of hair are left free at the front, and they fall past the cheekbones like a frame around the face, which makes the whole updo look gentle, romantic, and a little bit undone. The bun itself can sit high, mid-head, or low, because the tendrils are the feature, not the height, and they work with every placement as long as they are thin, soft, and left to fall on their own. This suits every face shape, because the tendrils can be cut to suit a round face, a long face, or a square jaw, and it works for fine, medium, and thick hair, because the tendrils are thin enough to fall softly on any texture. It is the bun to choose for a date, for photos, and for days when you want to look soft instead of sharp, because the tendrils keep the updo from looking scraped back and severe. It is also the bun that flatters glasses, earrings, and a bare neck, because the soft pieces draw the eye to the face instead of the hair. Try it with a centre part first, because the even tendrils frame the face best.
To build it, leave two thin sections free at the front before you gather the rest of the hair, one on each side of the part, and keep them about as wide as your little finger. Gather the rest of the hair into a bun at the height you like, twist it loosely, and pin it, then pull the bun apart gently so it looks full. Let the two front pieces fall on their own, and curl them very lightly with a curling wand if you want them to bend, because a slight bend makes them look intentional instead of accidental. Do not pull them back into the bun, and do not spray them stiff, because the softness is the whole point. Finish with a light hairspray on the bun only, and check the tendrils in a mirror from the front, because they should sit evenly on both sides. If one side falls shorter than the other, trim the longer one by a tiny amount, because even tendrils frame the face better than uneven ones. This is the bun to choose when you want a messy bun that looks romantic and soft from the front. It also suits a low bun, because the tendrils soften the nape and the neck.
6. Messy Bun with Curtain Bangs
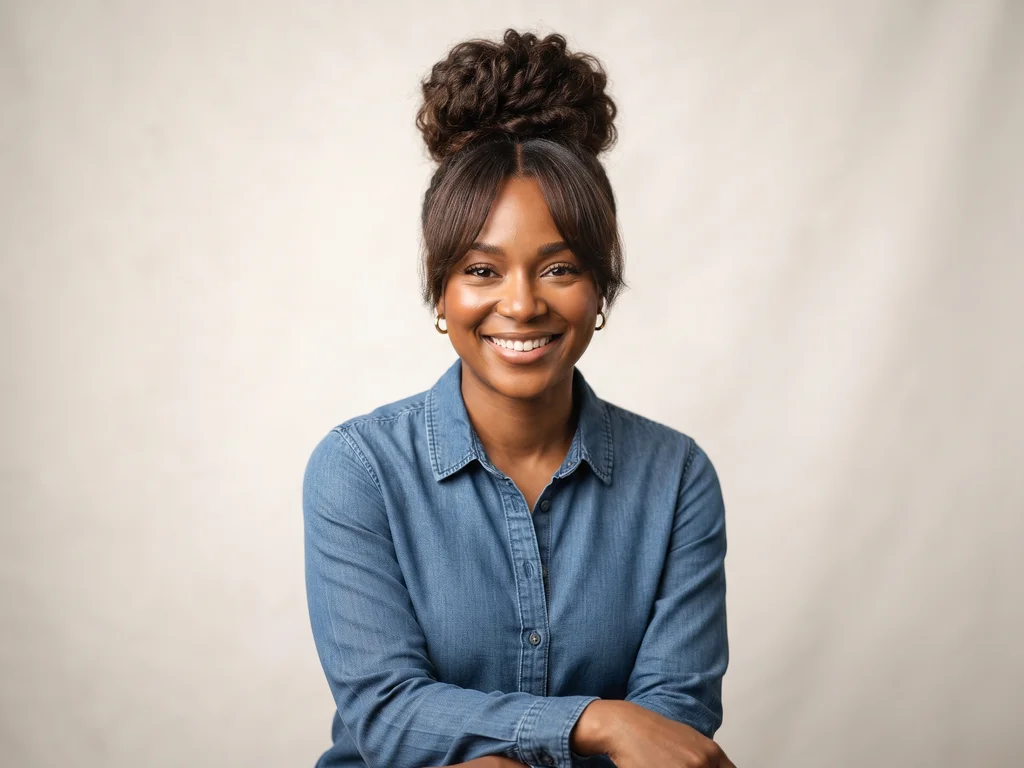
The messy bun with curtain bangs is the most modern messy bun in this guide, because the bangs part in the middle and sweep to each side like a curtain, and the bun sits behind them, so the face is framed by soft, sweeping hair while the rest of the hair stays up and out of the way. The bangs start at the cheekbones and blend into the loose pieces at the sides, which makes the face look brighter and the bun look softer, and the style works with a high, mid, or low bun, because the bangs are the feature and the bun is the support. This suits oval, round, and heart-shaped faces best, because the curtain bangs soften the forehead and the jawline at the same time, and it works for straight, wavy, and curly hair, because the bangs can be styled smooth or left to wave on their own. It is the bun to choose for a fresh, trendy look, because curtain bangs are one of the most requested fringe styles, and they make even a simple bun look like a planned hairstyle. It is also the bun that grows out well, because the bangs blend into longer layers if you stop trimming them.
To build it, blow dry the bangs forward with a round brush, then sweep them to each side while they are still warm, because the warmth sets the sweep. Gather the rest of the hair into a bun at the height you like, twist it loosely, and pin it, then pull the bun apart gently so it looks full and soft. Let the bangs fall on their own, and use a pea-sized amount of smoothing cream on them in the morning, because the cream tames flyaways without weighing the fringe down. Do not pull the bangs into the bun, and do not spray them stiff, because the sweep is what makes them look like curtain bangs. Finish with a light hairspray on the bun only, and check the part in a mirror, because a crooked part breaks the symmetry of the curtain. Trim the bangs every four to six weeks to keep their length, because bangs that grow too long lose their sweep and fall into the eyes. This is the bun to choose when you want your messy bun to look current, soft, and framed from the front. A little dry shampoo at the roots also helps, because it lifts the crown and keeps the bangs from falling flat.
7. Braided Messy Bun

The braided messy bun is the most detailed messy bun in this guide, because a braid runs into the bun, and the braid adds texture, pattern, and a handmade feeling that a plain twist can never match. You braid a section of hair first, either at the front, at the side, or underneath, and then gather everything into a loose bun, so the braid shows on one side of the bun and the rest of the hair falls soft around it. This suits medium and long hair best, because the braid needs length to show, and it works for straight, wavy, and curly hair, because the braid holds its shape on every texture. It flatters every face shape, because the braid can sit where you want it, at the front for drama or at the side for softness, and it is the bun to choose for a festival, for a wedding guest, or for a day when you want your hair to look like you spent time on it. It is also the bun that holds best in wind and heat, because the braid anchors the bun and keeps it from loosening. It also photographs well at golden hour, because the braid catches the light.
To build it, braid a section of hair first, starting at the front hairline or the side, and braid it loosely so it looks soft, not tight. Gather the rest of the hair, including the end of the braid, into a bun at the height you like, twist it loosely, and pin it, then pull the bun apart gently so it looks full. Pull the braid apart very gently with your fingers, a technique called pancaking, because widening the braid makes it look thicker and softer. Free a few thin pieces at the front and let them fall past the cheekbones, and finish with a light hairspray. If your hair is fine, braid on second-day hair, because the grip helps the braid hold. If your hair is thick, use a strong elastic at the base of the bun, because the bun carries the weight of the braid as well. This is the bun to choose when you want texture, detail, and a handmade look, and it is the one that turns a simple messy bun into a style people ask about. Practise the braid once on loose hair first, because a braid you can build without thinking makes the whole bun faster.
8. Messy Bun with a French Braid Crown

The messy bun with a French braid crown is the most romantic messy bun in this guide, because a French braid runs across the top of the head like a crown, and the bun sits behind it, so the whole style looks like a soft, braided halo with a loose bun at the back. You start the French braid at one temple, braid across the crown to the other side, and then gather everything into a low or mid bun, so the braid frames the face and the bun finishes the look. This suits medium and long hair best, because the braid needs length to cross the head, and it works for straight, wavy, and curly hair, because the braid holds its shape on every texture once the hair has some grip. It flatters oval and heart-shaped faces most, because the braid across the forehead softens the hairline and draws the eye upward, and it is the bun to choose for a wedding, for a garden party, or for a photo, because it looks soft, detailed, and a little bit magical. It is also the bun that stays in place longest, because the braid anchors the front and the bun anchors the back.
To build it, part the hair on the side, and start a French braid at the temple on the heavier side, adding small sections as you braid across the crown toward the other temple. Braid loosely, because a tight braid looks severe and a loose braid looks soft, and pull the braid apart gently once it is done, so it looks thick and relaxed. Gather the rest of the hair, including the end of the braid, into a loose bun at the back, twist it, and pin it, then pull the bun apart so it looks full. Free two thin pieces at the front and let them fall past the temples, and finish with a light hairspray. If your hair is fine, use dry shampoo at the roots before you braid, because the grip stops the braid from slipping. If your hair is thick, use extra pins at the base of the bun, because the bun carries the weight of the braid as well. This is the bun to choose when you want a crown of braid and a soft bun behind it. It also suits a garden wedding or a summer party, because the braided crown looks like flowers in the hair and the soft bun keeps the neck cool.
9. Curly Messy Bun

The curly messy bun is made for natural curls, because the curls give the bun a texture that straight hair can never match, and each curl shows a bright edge and a soft shadow at the same time, so the bun looks full, bouncy, and alive. You gather the curls loosely, twist them just enough to hold, and pin the bun where it falls, then let a few curls escape around the face and the nape, because the escaped curls are what make the style look soft instead of scraped back. This suits naturally curly hair best, from loose waves to tight coils, and it works for medium to thick hair, because the curls need enough density to hold their shape without looking thin at the ends. It flatters every face shape, because the curls soften the forehead and the jaw at the same time, and it is the bun to choose for a casual day, for a humid day, or for a day when your curls will not sit flat, because the bun works with the curl pattern instead of fighting it. It is also the bun that needs the least styling, because the curls do most of the work on their own.
To build it, gather the curls at the height you like, and do not brush them first, because brushing breaks the curl pattern and makes the hair look frizzy instead of defined. Twist the curls loosely, wrap them into a bun, and pin it with U-pins, then pull the bun apart very gently so it looks full without breaking the curls. Let a few curls fall free at the front and the nape, and define them with a pea-sized amount of curl cream, because the cream keeps the escaped curls soft and shiny. Finish with a light hairspray, and do not touch the bun again during the day, because touching curly hair makes it frizz. If your curls are fine, use a diffuser on a low heat before you gather them, because the diffuser adds volume at the roots. If you want more ideas for styling curly hair, Byrdie covers curly updos and bun care in its hair guides, and its tips on curl cream and diffusing are a useful companion to this guide. This is the bun to choose if you have natural curls and you want them to glow. Sleep on a silk pillowcase, because it keeps the curls soft and stops the bun from frizzing overnight.
10. Messy Bun for Short Hair

The messy bun for short hair is proof that you do not need long hair to wear a bun, because a small, loose bun on short hair looks cute, modern, and a little bit edgy, and it works with a bob, a lob, or a pixie that has grown out to the chin. You gather what length you have, twist it loosely, and pin it with a few small pins, then pull the bun apart so it looks bigger than it is, because the pulling is what turns a tiny knot into a real bun. This suits chin-length and shoulder-length hair best, and it works for straight, wavy, and curly short hair, because the bun is small and the texture is what makes it look full. It flatters round and heart-shaped faces most, because the small bun on top adds a little height, and the loose pieces around the face keep it soft. It is the bun to choose for a quick morning, for a casual day, or for a day when your short hair will not sit flat, because it takes two minutes and it needs only a few pins. It is also the bun that shows off a good haircut, because the short layers around the bun stay visible.
To build it, gather the hair at the crown or the middle of the head, and do not worry if some pieces fall out, because the fallen pieces are part of the look. Twist the gathered hair loosely, wrap it into a small bun, and pin it with two or three small U-pins, then pull the bun apart gently with your fingers until it looks as full as you can make it. Let the short layers at the sides and the nape fall free, and do not try to force them into the bun, because forcing short hair into a bun makes it look tight and uncomfortable. Use a texture spray before you gather the hair, because the spray gives short hair the grip it needs to hold. Finish with a light hairspray, and check the back once, because a small bun can lean if the pins are not even. If your hair is very short, use a small donut maker or a hair puff to add size inside the bun. If you want colour ideas for short hair to pair with this bun, the 20 Stunning Honey Blonde Hair Color for Short Hair That Make Hair Look Fuller guide shows warm dimension on short lengths, which looks lovely with a small, loose bun.
11. Messy Bun for Long Hair

The messy bun for long hair is the most dramatic messy bun in this guide, because long hair makes a big, full bun, and the size of the bun is what makes the whole style look rich, soft, and a little bit glamorous. You gather the length, twist it loosely, and wrap it around its own base two or three times, so the bun has layers and depth, and then you pull it apart until it looks as big as you want, because the pulling is what turns a heavy coil into a soft, airy bun. This suits long and very long hair best, and it works for straight, wavy, and curly long hair, because the length holds the twist the same way on every texture. It flatters every face shape, because the big bun balances the length of the hair, and it is the bun to choose for a formal day, for a photo, or for a day when you want your hair completely up and out of the way. It is also the bun that holds best through a long day, because the weight of the hair keeps the coil in place once it is pinned. It also suits a long flight, because the bun stays neat for hours.
To build it, gather the hair at the height you like, and secure it with a strong elastic, because a big bun needs a firm base. Twist the length loosely, wrap it around the base, and tuck the ends under with four or five U-pins, then pull the bun apart in small sections until it looks full and soft. Free two thin pieces at the front and let them fall past the cheekbones, and tug the hair at the crown lightly for a little lift. Finish with a firm hairspray, because a big bun needs more hold than a small one, and check the back once, because a heavy bun can slide down during the day. If your hair is very thick, split the ponytail into two sections and twist each one before you wrap them together, because two smaller twists sit better than one heavy coil. If your hair is fine but long, backcomb the ponytail lightly before you twist it, because the backcombing adds air inside the bun. This is the bun to choose when you want your long hair to look big, soft, and completely up. Use a silk scrunchie at the base, because the fabric holds long hair without leaving a crease.
12. Messy Bun with a Scrunchie

The messy bun with a scrunchie is the most comfortable messy bun in this guide, because a soft fabric scrunchie holds the bun without pulling, without creasing, and without the headache that a tight elastic can cause, and it adds a pop of colour or texture at the base of the bun. You gather the hair, secure it with the scrunchie, and twist it into a loose bun, then let the scrunchie show at the base, because the fabric is part of the look, not something to hide. This suits every hair length that can reach a bun, and it works for straight, wavy, and curly hair, because the scrunchie holds gently on every texture. It flatters every face shape, because the bun can sit high, mid, or low, and it is the bun to choose for a casual day, for a school run, for a long flight, or for a day when your hair needs a break from tight elastics. It is also the bun that is kindest to the hair, because the fabric does not snag or break the strands, and it is the one to choose when your hair feels dry or damaged. Keep a few scrunchies in your bag, because they double as a spare elastic.
To build it, gather the hair at the height you like, and wrap the scrunchie around the ponytail twice, not three times, because two wraps hold the bun loosely and three wraps make it tight. Twist the ponytail loosely, wrap it into a bun, and pin it with U-pins, then pull the bun apart gently so it looks full and soft. Let the scrunchie sit at the base of the bun where it shows, and choose a colour that matches your outfit or your mood, because a velvet scrunchie looks dressy and a cotton one looks casual. Free two thin pieces at the front and let them fall past the cheekbones, and finish with a light hairspray. If your hair is fine, use a smaller scrunchie, because a big one can overwhelm a small bun. If your hair is thick, use a large scrunchie, because it needs more fabric to hold the weight. This is the bun to choose when you want comfort, colour, and a soft hold all in one style. A scrunchie bun also works well for sleeping, because the soft fabric does not dig in, and you can wear it overnight to keep waves fresh for the morning.
13. Double Messy Buns

Double messy buns, also called space buns, are the most playful messy buns in this guide, because two small, loose buns sit high on either side of the head, and the symmetry makes the whole look feel fun, young, and a little bit bold. You part the hair down the middle, gather each side into a high ponytail, and twist each one into a small, loose bun, then pull both buns apart until they look soft and round instead of tight and small. This suits medium and long hair best, because each side needs enough length to make a bun, and it works for straight, wavy, and curly hair, because the twist holds the same way on every texture. It flatters oval and heart-shaped faces most, because the two buns balance the face, and it is the bun to choose for a festival, for a party, for a costume day, or for a day when you want your hair to make people smile. It is also the bun that photographs best from the front, because the two buns frame the face like a pair of soft, round shapes. They also suit a festival or a party, because the two buns read as fun from across the room.
To build it, part the hair straight down the middle, from the forehead to the nape, and gather each side into a high ponytail at the same height, because even buns are the whole point of the style. Secure each ponytail with a soft elastic, twist each one loosely, and wrap it into a small bun, then pin each bun with two U-pins. Pull both buns apart gently until they look the same size, and check them in a mirror from the front, because one bun bigger than the other breaks the symmetry. Free two thin pieces at the front, one on each side, and let them fall past the temples, and finish with a light hairspray. If your hair is fine, backcomb each ponytail lightly before you twist it, because the backcombing gives the small buns more size. If your hair is thick, use strong elastics, because each bun carries half the weight of your hair. This is the bun to choose when you want fun, symmetry, and a style that stands out. If one bun sits lower than the other, take it down and rebuild it, because even a small difference in height shows from the front, so always check both buns in the mirror before you leave the house.
14. Side Messy Bun

The side messy bun is the most romantic messy bun in this guide, because the bun sits low behind one ear, and the hair sweeps to one side, so the neck and the shoulder on the other side stay clear, and the whole style looks soft, sweeping, and a little bit glamorous. You sweep all the hair to one side, gather it low behind the ear, and twist it into a loose bun, then pull the bun apart gently and let a few pieces fall free on the side where the bun sits. This suits medium and long hair best, because the sweep needs length to show, and it works for straight, wavy, and curly hair, because the twist holds the same way on every texture. It flatters oval and long faces most, because the side sweep softens the forehead and the bun balances the jaw, and it is the bun to choose for a wedding, for a date, or for a photo, because it looks elegant from the front and soft from the side. It is also the bun that shows off earrings best, because the ear on the opposite side stays completely clear. It also suits a strapless dress, because the clear shoulder shows the neckline.
To build it, part the hair on the side opposite the bun, and sweep all the hair to the bun side with your hands, smoothing the top lightly. Gather the hair low behind the ear, secure it with a soft elastic, and twist it loosely into a bun, then pin it with U-pins and pull it apart gently so it looks full and soft. Free a few thin pieces at the front on the bun side and let them fall past the cheekbone, and leave the other side smooth, because the contrast between the two sides is what makes the style work. Finish with a light hairspray, and check the bun in a mirror from the side, because a side bun can slide down if the pins are not firm. If your hair is thick, split the ponytail into two sections and twist each one before you wrap them together, because two smaller twists sit flatter behind the ear. If your hair is fine, backcomb the ponytail lightly before you twist it, because the backcombing gives the bun more size. This is the bun to choose when you want romance, sweep, and a clear shoulder. A side bun also hides a grown-out fringe, because the sweep covers the forehead.
15. Messy Bun with a Silk Scarf
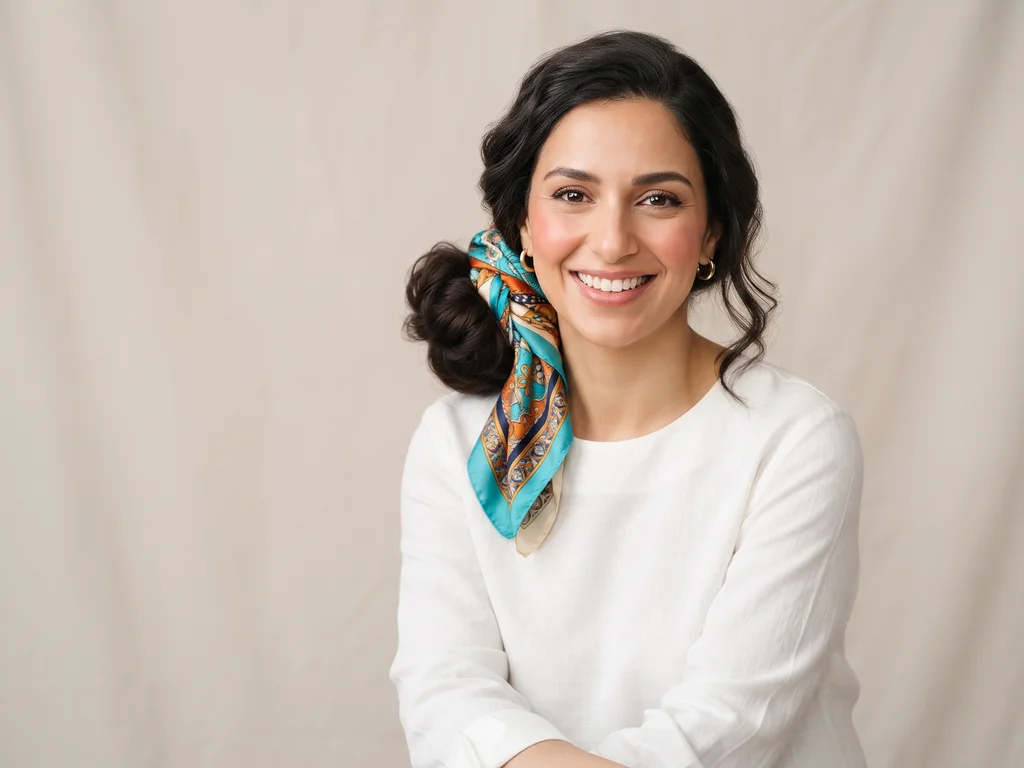
The messy bun with a silk scarf is the most polished messy bun in this guide, because a silk scarf wraps around the base of the bun, and the scarf adds colour, pattern, and a finished feeling that turns a casual bun into a style that looks planned. You build the bun first, then wrap the scarf around its base and tie it in a small bow or a knot, letting the ends fall soft over the bun or down the neck. This suits every hair length that can reach a bun, and it works for straight, wavy, and curly hair, because the scarf sits at the base and does not change how the bun holds. It flatters every face shape, because the bun can sit high, mid, or low, and it is the bun to choose for a brunch, for a holiday, for a photo, or for a day when you want your hair to look dressed up without any extra effort. It is also the bun that hides a bad hair day best, because the scarf covers the base where the bun starts, and the colour draws the eye away from the hair itself. A silk scarf also protects the hair from the sun on bright days.
To build it, gather the hair into a bun at the height you like, twist it loosely, and pin it, then pull the bun apart gently so it looks full and soft. Fold the silk scarf into a narrow band, wrap it around the base of the bun, and tie it in a small bow at the top or the side, letting the ends fall a few inches. Choose a scarf colour that matches your outfit or your mood, because a bright scarf makes the bun the feature and a neutral one keeps it soft. Free two thin pieces at the front and let them fall past the cheekbones, and finish with a light hairspray on the bun only, because the scarf does not need hold. If your hair is fine, use a smaller scarf, because a big one can overwhelm a small bun. If you want more colour ideas to pair with a scarf bun, the Hair Color Ideas category on this site gathers every colour guide in one place, so you can find a shade that matches your scarf. This is the bun to choose when you want colour, polish, and a finished look in two minutes. Keep the scarf small and light, because a heavy scarf can pull the bun down.
16. Messy Bun for the Gym

The messy bun for the gym is the hardest-working messy bun in this guide, because it has to stay in place through a run, a class, and a stretch, and it has to keep the hair off the neck and the face while you move, sweat, and bend. You gather the hair high, secure it firmly, and twist it into a tight, compact bun, then pin it hard and finish with a firm hairspray, because a gym bun is the one messy bun where hold matters more than softness. This suits every hair length that can reach a bun, and it works for straight, wavy, and curly hair, because the firm base holds the same way on every texture. It flatters every face shape, because the high placement keeps the face clear, and it is the bun to choose for a workout, for a run, for yoga, or for any day when your hair needs to stay up and out of the way. It is also the bun that protects the hair, because the bun keeps the ends tucked away from sweat and friction, and it is the one to choose when you want your hair to survive a workout.
To build it, gather the hair high at the crown, and secure it with a strong elastic, not a soft one, because the bun needs a firm base to survive movement. Twist the ponytail, wrap it into a compact bun, and pin it with four or five U-pins, pushing each pin in firmly, then pull the bun apart only a little, because a gym bun should look neat, not loose. Tuck every stray piece in with small pins, and finish with a firm hairspray, because the spray is what keeps the bun in place when you sweat. Use a sweat-wicking headband at the hairline if you sweat a lot, because the band keeps the sweat out of the hair and stops the front pieces from falling. If you want professional advice on workout hair and sweat care, Allure covers gym hairstyles and post-workout hair care in its hair guides, and its tips on dry shampoo and scalp care are a useful companion to this guide. This is the bun to choose when you want your hair to stay up, stay put, and stay out of your way. A gym bun also keeps sweat out of the hair, which means fewer washes during the week.
17. Messy Bun for Work

The messy bun for work is the most polished messy bun in this guide, because it has to look neat enough for a meeting and relaxed enough for a long day, and it has to hold from the morning commute to the last email without falling apart. You gather the hair at the middle of the head or low at the nape, smooth the top lightly, and twist it into a soft, controlled bun, then pull it apart only a little, because a work bun should look soft, not wild. This suits every hair length that can reach a bun, and it works for straight, wavy, and curly hair, because the controlled twist holds the same way on every texture. It flatters every face shape, because the smooth top and the soft bun balance the face, and it is the bun to choose for an office, for a video call, for an interview, or for any day when you need to look put together without spending twenty minutes on your hair. It is also the bun that pairs best with a blazer, a shirt, or a smart dress, because the neat bun keeps the focus on your face. It also works for a video call, because the neat bun keeps the focus on your face.
To build it, smooth the top of the hair lightly with your hands or a brush, and gather it at the middle of the head or low at the nape, depending on how formal you want it. Secure it with a soft elastic, twist it loosely, and pin it with U-pins, then pull the bun apart only a little, so it looks soft but controlled. Free one thin piece at each side of the face, or none at all if your workplace is very formal, because the tendrils are what make the bun look relaxed, and a formal office may want none. Finish with a light hairspray, and check the bun in a mirror from the front and the side, because a work bun shows every stray piece. Carry two spare pins in your bag, because a work bun that loosens during the day can be fixed in ten seconds. If your hair is fine, use dry shampoo at the roots before you gather it, because the grip helps the bun hold all day. This is the bun to choose when you want to look neat, calm, and ready for work. A work bun also survives a long commute, because the pins hold through wind and rain.
18. Messy Bun for a Wedding
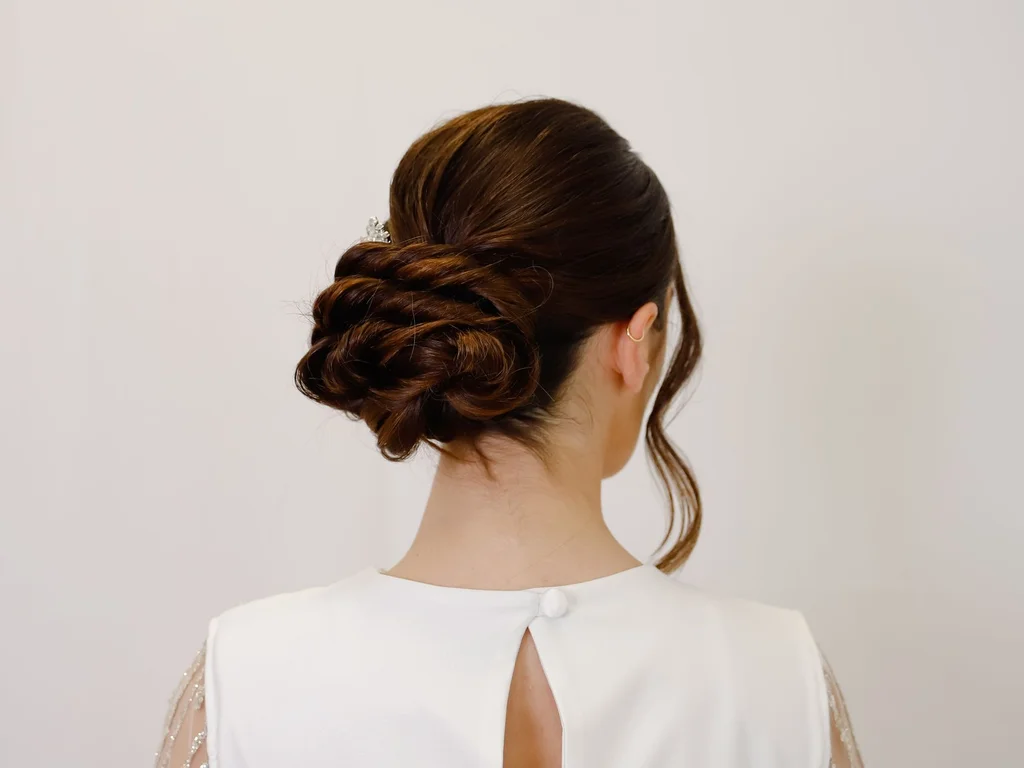
The messy bun for a wedding is the most elegant messy bun in this guide, because it has to look soft, romantic, and a little bit special, and it has to hold through a ceremony, a dinner, and dancing, without losing its shape or its softness. You gather the hair low or at the middle of the head, twist it loosely, and pin it so it looks full and airy, then pull out soft pieces around the face and the nape, and add a small flower, a pearl pin, or a thin braid for a special touch. This suits medium and long hair best, because the bun needs enough length to look full, and it works for straight, wavy, and curly hair, because the loose twist holds the same way on every texture. It flatters every face shape, because the soft pieces frame the face, and it is the bun to choose for a wedding guest, for a bridesmaid, or for a bride who wants a relaxed updo. It is also the bun that photographs best at a wedding, because the soft, undone texture looks romantic in photos, and it is the one that pairs well with a dress, with earrings, and with a bare neck.
To build it, curl the hair lightly first with a curling wand, because the curls give the bun texture and help it hold, and let the curls cool before you gather them. Gather the hair low or at the middle of the head, twist it loosely, and pin it with U-pins, then pull the bun apart gently so it looks full and airy. Free several soft pieces around the face and the nape, and curl them lightly, because the curled tendrils are what make the bun look romantic. Add a small flower, a pearl pin, or a thin braid at the side, and finish with a firm hairspray, because a wedding bun has to last all day and all night. If you are over fifty and you want a softer, more graceful version of this look, the 23 Dreamy Mocha Balayage Hair Color Ideas for Women Over 50 to Try This Season guide shows a gentle face-framing style that blends grey and keeps the grow-out kind, which pairs beautifully with a soft, low bun. This is the bun to choose when you want romance, softness, and a style that lasts through the last dance. It also suits a beach wedding, because the soft bun holds up in sea air.
19. Messy Bun with Loose Waves
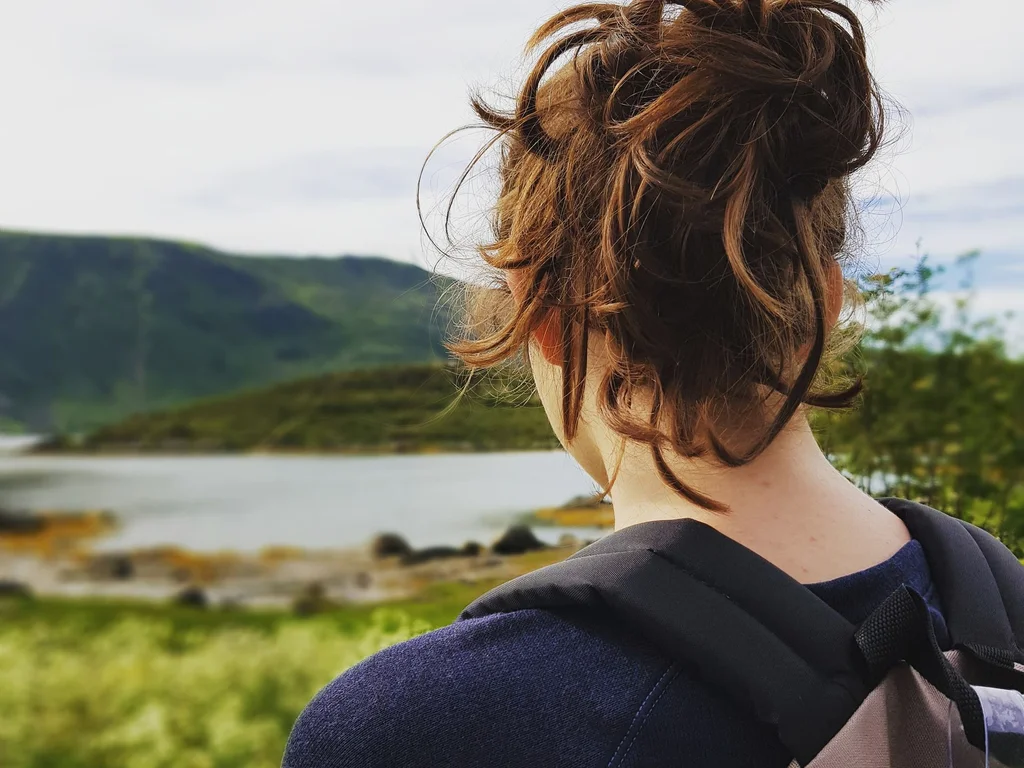
The messy bun with loose waves is the most relaxed messy bun in this guide, because the hair is waved first, and the waves give the bun a soft, beachy texture that looks like you spent the day outside, even when you only spent ten minutes with a curling wand. You curl the hair in loose, wide waves, let them cool, and then gather everything into a soft bun, so the waves show at the crown, at the sides, and in the tendrils that fall free around the face. This suits medium and long hair best, because the waves need length to show, and it works for straight hair that holds a curl and for naturally wavy hair, because the bun holds the same way on both. It flatters every face shape, because the waves soften the forehead and the jaw, and it is the bun to choose for a holiday, for a brunch, for a photo, or for a day when you want your hair to look soft, sunny, and a little bit beachy. It is also the bun that looks best with warm, sun-kissed colour, because the waves catch the light and show the lighter pieces. Loose waves also suit a low bun, because the waves fall soft around the neck.
To build it, curl the hair in loose, wide sections with a large curling wand, and let the curls cool completely before you touch them, because cool curls hold their shape. Gather the hair into a bun at the height you like, twist it loosely, and pin it, then pull the bun apart gently so the waves show. Free a few wavy pieces at the front and let them fall past the cheekbones, and finish with a light hairspray, because heavy spray flattens waves. Use a sea salt spray on the waves before you gather them, because the spray adds grip and texture. If you want warm, dimensional colour to pair with wavy hair, the 30 Chic Mocha Balayage Hair Color for Summer That Turn Heads Instantly guide shows the same wavy finish with mocha tones, which is a useful comparison when you choose a shade for summer. This is the bun to choose when you want waves, softness, and a beachy feeling in your hair. If your hair will not hold a wave, braid it damp the night before, because the braid waves last all day, and a light texture spray in the morning brings the waves back to life. A wavy bun also hides new growth well, because the waves break up the root line.
20. Messy Bun with a Donut Maker

The messy bun with a donut maker is the easiest way to get a big, full bun, because the donut is a soft foam ring that sits inside the bun and gives it size, shape, and hold, even when your hair is fine or short. You pull the ponytail through the donut, spread the hair over it, and tuck the ends under, then pull the hair apart gently so the donut disappears inside the bun and the bun looks naturally full. This suits fine and short hair best, because the donut adds the size that fine hair cannot make on its own, and it works for straight, wavy, and curly hair, because the hair spreads over the donut the same way on every texture. It flatters every face shape, because the bun can sit high, mid, or low, and it is the bun to choose for a formal day, for a photo, or for a day when you want your bun to look big and round. It is also the bun that holds best, because the donut gives the pins something firm to grip, and it is the one to choose when you want a full bun without backcombing. A donut bun also suits a formal event, because the round shape looks neat.
To build it, gather the hair into a ponytail at the height you like, and slide the donut over the ponytail to the base. Spread the hair evenly over the donut, tuck the ends under the donut, and pin them with U-pins, then pull the hair apart gently so it covers the donut completely and looks soft. Choose a donut that matches your hair colour, because a matching donut disappears inside the bun, and a wrong colour can show through thin hair. Free two thin pieces at the front and let them fall past the cheekbones, and finish with a light hairspray. If your hair is very fine, use a small donut, because a big one can look too round. If your hair is thick, use a large donut, because it needs more room. This is the bun to choose when you want size, shape, and a bun that looks full from every angle, and it is the one that makes a small amount of hair look like a lot. If the donut shows through thin hair, choose a smaller donut or a darker one that matches your roots, because a hidden donut is what makes the bun look natural, and a visible one breaks the illusion.
21. Messy Bun with Side-Swept Bangs

The messy bun with side-swept bangs is the most elegant messy bun in this guide, because the bangs sweep to one side in a long, smooth line, and the bun sits behind them, so the face is framed by a soft, sweeping fringe while the rest of the hair stays up and out of the way. The bangs start at the part and fall across the forehead to one side, which makes the face look brighter and the bun look softer, and the style works with a high, mid, or low bun, because the bangs are the feature and the bun is the support. This suits oval, long, and heart-shaped faces best, because the side sweep softens the forehead and balances the length of the face, and it works for straight, wavy, and curly hair, because the bangs can be styled smooth or left to wave on their own. It is the bun to choose for a polished look, because side-swept bangs are classic and never go out of fashion, and they make even a simple bun look like a planned hairstyle. It is also the bun that grows out well, because the bangs blend into longer layers if you stop trimming them.
To build it, blow dry the bangs to one side with a round brush, sweeping them while they are still warm, because the warmth sets the sweep. Gather the rest of the hair into a bun at the height you like, twist it loosely, and pin it, then pull the bun apart gently so it looks full and soft. Let the bangs fall on their own, and use a pea-sized amount of smoothing cream on them in the morning, because the cream tames flyaways without weighing the fringe down. Do not pull the bangs into the bun, and do not spray them stiff, because the sweep is what makes them look soft. Finish with a light hairspray on the bun only, and check the part in a mirror, because the part decides which side the bangs sweep to. Trim the bangs every four to six weeks to keep their length, because bangs that grow too long lose their sweep and fall into the eyes. This is the bun to choose when you want your messy bun to look swept, smooth, and elegant. Side-swept bangs also suit a low bun, because the sweep at the front and the bun at the nape balance each other nicely.
22. Messy Bun for Thick Hair

The messy bun for thick hair is built for weight, because thick hair makes a heavy bun, and a heavy bun needs a different method, with the hair split into sections, a strong base, and enough pins to hold the weight all day. You split the ponytail into two sections, twist each one separately, and wrap them together into one bun, so the weight is spread across the base instead of hanging from one coil. This suits thick and very thick hair best, and it works for straight, wavy, and curly thick hair, because the split method holds the same way on every texture. It flatters every face shape, because the bun can sit high, mid, or low, and it is the bun to choose for a long day, for a hot day, or for a day when your thick hair usually falls out of a bun by noon. It is also the bun that keeps the neck coolest, because the thick hair is lifted completely off the neck, and it is the one to choose when you want your thick hair to feel light instead of heavy. A thick bun also suits a hot day, because the hair stays completely off the neck.
To build it, gather the hair at the height you like, and secure it with a strong elastic, because a thick bun needs a firm base. Split the ponytail into two equal sections, twist each section loosely, and wrap them around the base in opposite directions, then pin each wrap with two or three U-pins, pushing each pin in firmly. Pull the bun apart gently so it looks full and soft, and free two thin pieces at the front, because the tendrils keep the heavy bun from looking severe. Finish with a firm hairspray, because a thick bun needs more hold than a fine one, and check the bun after an hour, because a heavy bun can slide down if the pins are not firm. Use a scrunchie instead of a thin elastic at the base, because the fabric holds thick hair better and does not snap. This is the bun to choose when your hair is thick and every other bun falls out by lunch. If the bun still slides, use two elastics at the base, one over the other, because the double base holds twice the weight, and add one more pin at the bottom of the bun, where the weight pulls hardest.
23. Messy Bun for Fine Hair

The messy bun for fine hair is built for volume, because fine hair makes a small bun, and a small bun needs backcombing, texture, and a little help to look full instead of flat. You backcomb the ponytail lightly, use dry shampoo at the roots, and twist the hair loosely, so the bun has air inside it, and then you pull it apart gently until it looks twice as big as it started. This suits fine and thin hair best, and it works for straight and wavy fine hair, because the backcombing adds the volume that fine hair cannot make on its own. It flatters every face shape, because the bun can sit high for height or low for softness, and it is the bun to choose for a photo, for a date, or for a day when you want your fine hair to look full. It is also the bun that needs the most texture, because fine hair is smooth and slippery, and texture is what gives the pins something to grip. Fine hair also dries faster than thick hair, so a fine-hair bun is ready to style sooner after a wash, and a quick blast with the dryer adds lift at the roots.
To build it, use dry shampoo at the roots before you gather the hair, because the dry shampoo gives fine hair the grip it needs to hold. Gather the hair at the height you like, and backcomb the ponytail lightly with a fine comb, holding each section up and combing down toward the base. Twist the ponytail loosely, wrap it into a bun, and pin it with U-pins, then pull the bun apart very gently, because the backcombing is what makes the bun look full, and pulling too hard flattens it. Free two thin pieces at the front and let them fall past the cheekbones, and finish with a light hairspray, because heavy spray flattens fine hair. Use a small donut maker inside the bun if you want more size, because the donut adds volume without backcombing. Do not use a heavy conditioner on bun days, because heavy conditioner makes fine hair slippery and the bun falls out. This is the bun to choose when your hair is fine and you want it to look full, soft, and twice as big. A fine-hair bun also looks good with a headband, because the band adds a little extra grip at the front.
24. Twisted Messy Bun

The twisted messy bun is the simplest messy bun in this guide, because it uses only a twist, with no braid, no donut, and no backcombing, and the twist itself is what gives the bun its shape, its texture, and its soft, rope-like look. You split the hair into two sections, twist each one, and wrap them together into a bun, so the two twists coil around each other and make a bun that looks detailed without any extra work. This suits medium and long hair best, because the twist needs length to show, and it works for straight, wavy, and curly hair, because the twist holds the same way on every texture. It flatters every face shape, because the bun can sit high, mid, or low, and it is the bun to choose for a quick morning, for a casual day, or for a day when you want your hair to look like you tried, even when you only spent two minutes on it. It is also the bun that holds best on second-day hair, because the grip of day-old hair helps the twist stay in place. A twisted bun also works on damp hair, because the twist sets as the hair dries.
To build it, gather the hair at the height you like, and split the ponytail into two equal sections. Twist each section in the same direction, then wrap the two twists around each other and around the base of the ponytail, and pin the ends underneath with U-pins. Pull the bun apart gently so it looks full and soft, and free two thin pieces at the front, because the tendrils keep the twisted bun from looking too neat. Finish with a light hairspray, and check the bun in a mirror from the back, because the two twists should look even. If your hair is fine, use dry shampoo at the roots before you gather it, because the grip helps the twist hold. If you want warm, dimensional colour to pair with a twisted bun, the 20 Stunning Mocha Balayage Hair Color Ideas for Short Hair That Make Hair Look Fuller guide shows warm dimension on short lengths, which looks lovely with a soft, twisted bun. This is the bun to choose when you want a simple twist to do all the work. Practise the twist twice and it becomes muscle memory, because the same simple motion works for every bun in this guide, and the bun gets faster each time.
25. Messy Bun with a Fishtail Braid

The messy bun with a fishtail braid is the most detailed messy bun in this guide, because a fishtail braid runs into the bun, and the fishtail pattern looks like a fine, woven rope, which adds a handmade, boho feeling that a plain braid can never match. You braid a fishtail at the side or underneath, then gather everything into a loose bun, so the fishtail shows on one side of the bun and the rest of the hair falls soft around it. This suits medium and long hair best, because the fishtail needs length to show its pattern, and it works for straight, wavy, and curly hair, because the braid holds its shape on every texture once the hair has some grip. It flatters every face shape, because the fishtail can sit where you want it, at the side for softness or underneath for a hidden detail, and it is the bun to choose for a festival, for a holiday, or for a day when you want your hair to look boho and handmade. It is also the bun that holds best in wind, because the fishtail anchors the bun and keeps it from loosening. A fishtail also suits a holiday, because the woven pattern looks like beach hair.
To build it, take a section of hair at the side, split it into two halves, and braid a fishtail by taking a thin piece from the outside of one half and crossing it to the inside of the other half, repeating until you reach the ends. Braid loosely, because a loose fishtail looks soft, and pull it apart gently once it is done, so it looks thick and relaxed. Gather the rest of the hair, including the end of the fishtail, into a bun at the height you like, twist it loosely, and pin it, then pull the bun apart gently so it looks full. Free a few thin pieces at the front and let them fall past the cheekbones, and finish with a light hairspray. If your hair is fine, braid on second-day hair, because the grip helps the fishtail hold. If your hair is thick, use a strong elastic at the base of the bun, because the bun carries the weight of the braid as well. This is the bun to choose when you want a woven, boho detail in your messy bun. A fishtail bun also pairs well with a denim jacket, because the boho braid suits casual clothes.
26. Messy Bun with a Headband
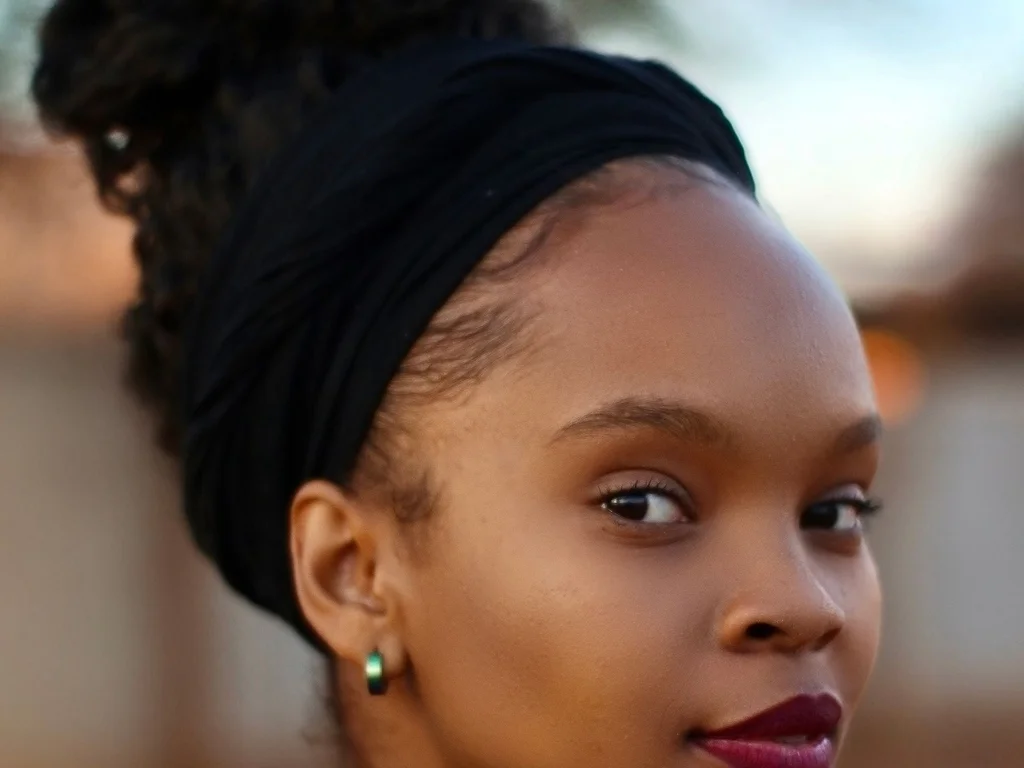
The messy bun with a headband is the easiest way to make a messy bun look finished, because a headband sits at the hairline, keeps the front smooth, and adds colour or sparkle, while the bun behind it stays soft and loose. You put the headband on first, then build the bun behind it, so the band frames the face and the bun finishes the look, and the two pieces work together like a set. This suits every hair length that can reach a bun, and it works for straight, wavy, and curly hair, because the headband sits at the front and does not change how the bun holds. It flatters every face shape, because the headband can sit close to the hairline for a neat look or further back for a soft look, and it is the bun to choose for a school day, for a workout, for a brunch, or for a day when your front hair will not stay back. It is also the bun that is best for growing out bangs, because the headband holds the short pieces back while the bun holds the rest. A headband bun also suits a school day, because the band keeps the front neat all day.
To build it, put the headband on first, sitting it where you like it, and smooth the front hair under it with your hands. Gather the rest of the hair into a bun at the height you like, twist it loosely, and pin it, then pull the bun apart gently so it looks full and soft. Choose a headband that matches your outfit or your mood, because a velvet band looks dressy, a fabric band looks casual, and a thin metal band looks neat. Free two thin pieces at the front, in front of the headband, and let them fall past the cheekbones, because the tendrils keep the style soft. Finish with a light hairspray on the bun only, because the headband does not need hold. If your hair is fine, use a headband with small teeth, because the teeth stop it from slipping. If your hair is thick, use a wide, soft band, because a thin one can dig in. This is the bun to choose when you want a headband to do the neat work and the bun to do the soft work. A headband also hides a bad fringe day, because the band covers the hairline completely and keeps short pieces out of your eyes.
27. Messy Bun for Second-Day Hair
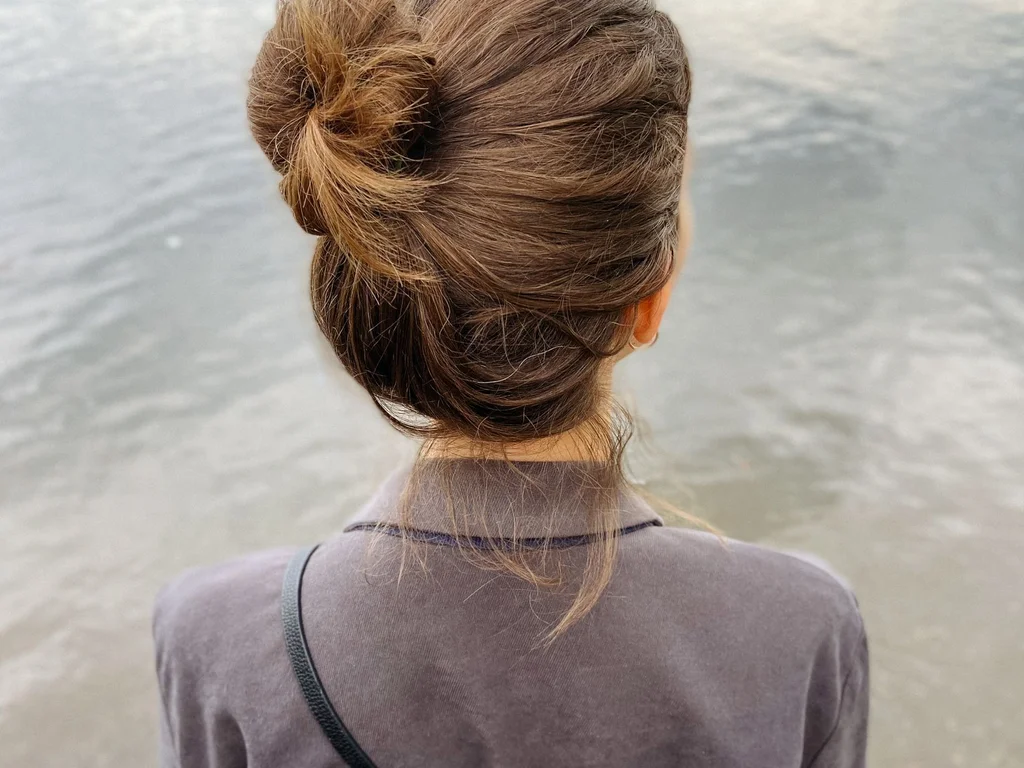
The messy bun for second-day hair is the most useful messy bun in this guide, because second-day hair has natural grip, natural texture, and natural volume at the roots, and all three things are exactly what a messy bun needs to hold and to look full. You do not wash the hair, you do not start fresh, you simply refresh the roots with dry shampoo, gather the hair, and twist it into a bun, and the bun looks better than it would on freshly washed hair, because the grip is already there. This suits every hair length that can reach a bun, and it works for straight, wavy, and curly hair, because second-day texture helps every type hold its shape. It flatters every face shape, because the bun can sit high, mid, or low, and it is the bun to choose for a busy morning, for a no-wash day, or for a day when you want to skip the shampoo and still look put together. It is also the bun that saves the most time, because it turns a bad hair day into a good hair day in two minutes. Second-day hair also holds a braid better, because the grip stops the braid from slipping.
To build it, spray dry shampoo at the roots, wait thirty seconds, and massage it in with your fingers, because the dry shampoo soaks up oil and adds grip at the same time. Gather the hair at the height you like, twist it loosely, and pin it, then pull the bun apart gently so it looks full and soft. Free two thin pieces at the front and let them fall past the cheekbones, and finish with a light hairspray. Do not brush the hair first, because brushing second-day hair makes it flat and removes the texture that helps the bun hold. If the roots still look oily, add a little more dry shampoo and wait again, because patience is what makes dry shampoo work. If you want professional advice on second-day hair and dry shampoo, Redken explains its dry shampoo and styling ranges in detail, and its guidance on refreshing hair between washes is a useful companion to this guide. This is the bun to choose when you want to skip a wash and still look great. If the roots still look flat, flip your head forward and massage them with your fingers, because the flip adds instant lift at the crown.
28. Messy Bun with a Low Ponytail Wrap
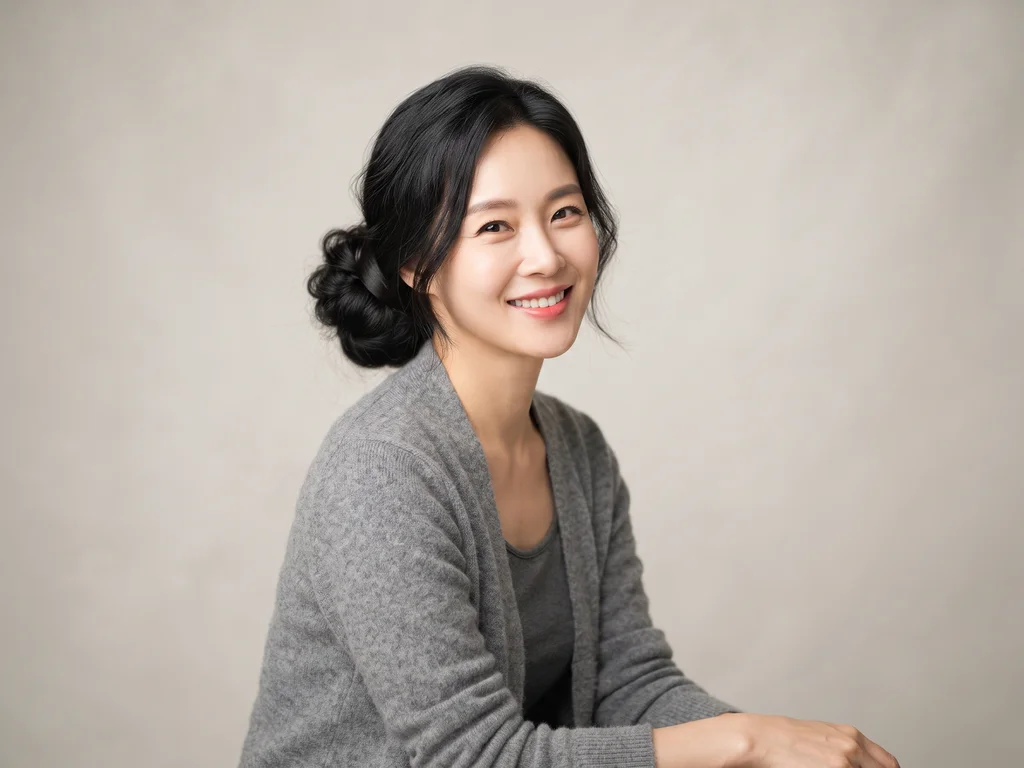
The messy bun with a low ponytail wrap is the most polished messy bun in this guide, because a thin piece of hair wraps around the base of the ponytail and hides the elastic, so the bun looks neat and finished from every angle, even though it is still soft and loose. You build a low ponytail first, wrap a thin section of hair around its base, and pin the wrap underneath, then twist the rest into a loose bun, so the base looks clean and the bun looks soft. This suits medium and long hair best, because the wrap needs a little length to circle the base, and it works for straight, wavy, and curly hair, because the wrap holds the same way on every texture. It flatters every face shape, because the low bun and the clean base balance the face, and it is the bun to choose for work, for a dinner, or for a photo, because the hidden elastic makes the bun look like a salon style. It is also the bun that looks most expensive, because the wrapped base is a small detail that makes a big difference. A wrapped base also suits a silk scarf, because the scarf and the wrap both hide the elastic.
To build it, gather the hair low at the nape, and take a thin section from underneath the ponytail, about as wide as your little finger. Secure the ponytail with an elastic, then wrap the thin section around the elastic, covering it completely, and pin the end underneath with a small pin. Twist the rest of the ponytail loosely, wrap it into a bun, and pin it, then pull the bun apart gently so it looks full and soft. Free two thin pieces at the front and let them fall past the cheekbones, and finish with a light hairspray. Check the wrap in a mirror from the back, because the wrap should cover the elastic completely, and if any elastic shows, wrap the section once more. If your hair is fine, use a slightly wider section for the wrap, because a thin one can disappear into fine hair. This is the bun to choose when you want a low bun that looks neat, clean, and finished. If the wrap keeps slipping, pin it twice, once at the top of the wrap and once at the bottom, because two pins hold the wrap flat, and a flat wrap is what makes the base look clean from every angle.
Messy Bun Styles Compared: Placement, Difficulty, and Best Occasion
| Style | Placement | Difficulty | Best occasion | Best hair type |
|---|---|---|---|---|
| Classic high messy bun | High on the crown | Easy, 2 minutes | Everyday, busy mornings | Medium to long, all textures |
| Low messy bun at the nape | Low at the nape | Easy, 3 minutes | Work, dinner, formal days | Thick and long, straight to wavy |
| Messy top knot | Very top of the head | Easy, 3 minutes | Hot days, workouts, festivals | Long and thick, all textures |
| Half-up messy bun | Top half at the crown | Easy, 2 minutes | Casual days, dates, photos | Medium to long, all textures |
| Braided messy bun | Mid or low, braid at the side | Medium, 5 minutes | Festivals, weddings, parties | Medium to long, all textures |
| Double messy buns | High on both sides | Medium, 5 minutes | Festivals, parties, fun days | Medium to long, all textures |
| Messy bun for the gym | High at the crown | Easy, 2 minutes | Workouts, runs, yoga | All lengths, all textures |
Messy Bun Care Schedule by Hair Type
| Hair type | Refresh | Bun hold | Wash | Care tip |
|---|---|---|---|---|
| Fine / straight | Dry shampoo at the roots | Light, backcomb first | Every 2 to 3 days | Use a small donut for size, avoid heavy conditioner on bun days |
| Medium / wavy | Sea salt spray on the lengths | Medium, soft elastic | Every 2 to 3 days | Scrunch the waves, let tendrils fall free, light hairspray only |
| Thick / coarse | Leave-in conditioner on the ends | Firm, strong elastic, extra pins | Every 3 to 4 days | Split the ponytail into two twists, use a scrunchie at the base |
| Curly (3A to 4A) | Curl cream on the escaped curls | Loose, U-pins only | Every 3 to 4 days | Do not brush dry curls, define with a diffuser, deep mask weekly |
| Short / bob length | Texture spray before gathering | Light, small U-pins | Every 2 to 3 days | Let short layers fall free, use a small donut for extra size |
Frequently Asked Questions About Messy Bun Hairstyle
How do I make a messy bun that stays all day?
A messy bun stays all day when it is built on hair that has grip, because clean, slippery hair slides out of pins, while day-old hair, dry shampoo at the roots, or a little sea salt spray gives the pins something to hold. Start by spraying dry shampoo at the roots, waiting thirty seconds, and massaging it in, then gather the hair and secure it with a strong elastic, not a soft one, because the elastic is the base that carries the bun. Twist the hair loosely, wrap it into a bun, and pin it with four or five U-pins, pushing each pin in firmly and crossing two of them at the base, because crossed pins hold better than parallel pins. Pull the bun apart gently so it looks full, free two thin pieces at the front, and finish with a firm hairspray from arm’s length, because the spray seals the pins and the tendrils in place. Check the bun after an hour, because a heavy bun can slide down if the pins are not firm, and carry two spare pins in your bag for a quick fix. If your hair is fine, backcomb the ponytail lightly before you twist it, and if your hair is thick, split the ponytail into two sections and twist each one, because the split spreads the weight. A messy bun that is built loose but pinned firmly is the one that lasts from morning to night.
Can I do a messy bun with short hair?
Yes, you can do a messy bun with short hair, and it works best on chin-length and shoulder-length hair, because that length is enough to gather, twist, and pin into a small, loose bun. Gather what length you have at the crown or the middle of the head, twist it loosely, and pin it with two or three small U-pins, then pull the bun apart gently until it looks as full as you can make it, because the pulling is what turns a tiny knot into a real bun. Let the short layers at the sides and the nape fall free, and let the fallen pieces stay free, because they are part of the look. Use a texture spray before you gather the hair, because the spray gives short hair the grip it needs to hold, and use a small donut maker or a hair puff inside the bun if you want more size. If your hair is a pixie that has grown out to the chin, a half-up messy bun is the easiest first step, because it only needs the top section. If you want colour ideas for short hair to pair with a small bun, the 26 Effortless Blonde Balayage Hair Color for Short Hair for a Fresh Look guide shows warm dimension on short lengths, which looks lovely with a loose, small bun. A short messy bun looks cute, modern, and a little bit edgy, and it takes two minutes.
How do I make a messy bun look full with fine hair?
A messy bun looks full with fine hair when you add air inside the bun, because fine hair makes a small bun on its own, and the air is what makes it look twice as big. Start with dry shampoo at the roots, because the dry shampoo gives fine hair the grip it needs to hold, and gather the hair at the height you like. Backcomb the ponytail lightly with a fine comb, holding each section up and combing down toward the base, because the backcombing puts air between the strands. Twist the ponytail loosely, wrap it into a bun, and pin it with U-pins, then pull the bun apart very gently, because the backcombing is what makes the bun look full, and pulling too hard flattens it. Free two thin pieces at the front and let them fall past the cheekbones, and finish with a light hairspray, because heavy spray flattens fine hair. Use a small donut maker inside the bun if you want more size, because the donut adds volume without backcombing, and choose a donut that matches your hair colour so it disappears inside the bun. Do not use a heavy conditioner on bun days, because heavy conditioner makes fine hair slippery and the bun falls out. A fine-hair bun that is backcombed, pulled apart gently, and sprayed lightly looks full, soft, and twice as big as it started.
What is the difference between a messy bun and a top knot?
A messy bun and a top knot are cousins, but they are not the same style, because the difference is height, size, and mood, and knowing the difference helps you pick the right one for your day. A messy bun is the general name for any loose, undone bun, and it can sit high, mid-head, or low at the nape, while a top knot is a specific kind of messy bun that sits right at the very top of the head, and it is usually bigger, higher, and bolder than a regular messy bun. A messy bun is soft and relaxed, with loose pieces around the face and a gentle shape, while a top knot is dramatic and statement-making, with height on top and a clear neck, and it reads as cool and confident. A messy bun takes two minutes and works for work, weddings, and every day, while a top knot takes three minutes and works best for hot days, workouts, festivals, and days when you want your hair completely off your face. The building method is the same, because both start with a ponytail, a twist, and pins, and the only change is where you gather the hair and how big you pull the knot. If you want height and drama, choose a top knot, and if you want softness and ease, choose a messy bun.
How do I keep my messy bun from falling out at the gym?
A messy bun stays in at the gym when it is built for hold, because a gym bun is the one messy bun where firmness matters more than softness, and every step should be a little tighter than usual. Gather the hair high at the crown, and secure it with a strong elastic, not a soft one, because the bun needs a firm base to survive running, jumping, and bending. Twist the ponytail, wrap it into a compact bun, and pin it with four or five U-pins, pushing each pin in firmly and crossing two of them at the base, because crossed pins hold better than parallel pins. Pull the bun apart only a little, because a gym bun should look neat, not loose, and tuck every stray piece in with small pins, so nothing falls into your face when you move. Finish with a firm hairspray, because the spray is what keeps the bun in place when you sweat, and use a sweat-wicking headband at the hairline if you sweat a lot, because the band keeps the sweat out of the hair and stops the front pieces from falling. After the workout, take the bun down, let the hair breathe, and wash it or refresh it with dry shampoo, because sweat left in the hair can make the scalp itchy. A gym bun that is pinned firmly and sprayed well stays up through a whole class.
Can I wear a messy bun to a wedding or a formal event?
Yes, you can wear a messy bun to a wedding or a formal event, and it works beautifully, because a soft, low messy bun looks romantic and elegant, and it is one of the most popular updos for wedding guests and bridesmaids. Curl the hair lightly first with a curling wand, because the curls give the bun texture and help it hold, and let the curls cool before you gather them. Gather the hair low or at the middle of the head, twist it loosely, and pin it with U-pins, then pull the bun apart gently so it looks full and airy. Free several soft pieces around the face and the nape, and curl them lightly, because the curled tendrils are what make the bun look romantic, and add a small flower, a pearl pin, or a thin braid at the side for a special touch. Finish with a firm hairspray, because a wedding bun has to last through a ceremony, a dinner, and dancing, and check the bun in a mirror from the front, the side, and the back, because a formal bun shows every detail. Pair the bun with earrings and a dress that leaves the neck clear, because the low bun and the bare neck work together. A messy bun at a wedding looks soft, romantic, and a little bit special, and it is the one that photographs beautifully.
What products do I need for a messy bun?
You need very few products for a messy bun, and that is one of the reasons the style is so popular, because the whole kit fits in a small bag and costs very little. Start with a soft elastic for a casual bun or a strong elastic for a gym bun, because the elastic is the base that carries the bun, and a scrunchie is a good choice when you want comfort and no crease. Add three to five U-pins, because U-pins hold a bun better than straight bobby pins, and keep two spare pins in your bag for a quick fix during the day. Add dry shampoo for grip at the roots, because dry shampoo is what makes second-day hair hold a bun, and add sea salt spray for texture through the lengths, because the spray gives the hair grip without making it stiff. Add a light hairspray to finish, because the spray seals the bun and the tendrils, and a firm hairspray for a gym bun or a wedding bun, because those buns need more hold. Add a texture paste or a curl cream if you want to define the tendrils, and a smoothing cream for the bangs, because a pea-sized amount tames flyaways. That is the whole kit, and with it you can build every messy bun in this guide.
Conclusion
Messy bun hairstyle is the easy updo that works for almost every woman, every hair type, and every plan, and the 28 ideas in this guide show that there is a messy bun for a busy morning, for work, for the gym, for a wedding, and for a lazy Sunday, all built from the same simple base. The classic high bun is the easiest first step, the low bun at the nape is the most elegant, the top knot is the boldest, and the half-up bun is the best of both worlds, so the right choice depends on your hair length, your hair type, and where you are going. The ideas that work best share three things: hair with grip, a bun built loose and pinned firmly, and a few soft pieces pulled free around the face, because those three things are what make a messy bun look soft, full, and intentional instead of accidental. Save the ideas you liked most, and try one new bun each week, because the only way to learn a messy bun is to build it with your own hands a few times until the motion feels natural. Start with the classic high bun today, because it is the easiest one to learn.
The care is as simple as the style, because a messy bun only looks good when the hair has grip and the bun has hold, and both things come from a few small habits. Wash less often, use dry shampoo at the roots, use sea salt spray for texture, and keep a few U-pins and a light hairspray in your bag, because those habits are what keep a messy bun in place from morning to night. Do not pull the bun too tight, and do not spray it stiff, because a messy bun should look soft and relaxed, and a stiff bun loses the whole point of the style. Use a scrunchie when your hair feels dry or damaged, and give your hair a break from tight elastics on rest days, because the hair needs rest just like the rest of you. If you want to keep exploring, the next guides on this site are the 20 Stunning French Bob Haircut That Make Hair Look Fuller, 27 Gorgeous Layered Bob Haircut to Try This Season, and 23 Dreamy Blunt Bob Haircut That Turn Heads Instantly guides, and each one shows a short cut that pairs beautifully with a small, loose bun. The bob guides are worth reading even if you keep your hair long, because they show how short layers behave around a bun.
Save the idea you liked most, practise it twice in front of a mirror, and give yourself permission for the first try to look imperfect, because a messy bun is supposed to look a little bit undone, and the second try always looks better than the first. With the right grip, the right pins, and a few soft pieces around the face, your hair can look soft, full, and finished in two minutes, and that is the result this guide was written to help you reach. Hair should work for your life, not the other way round, and a messy bun that holds all day, flatters your face, and suits your week is a style you can enjoy every single day, not just on special occasions. Talk to your stylist about your hair type, your length, and how often you wash, because those three facts shape the bun more than any photo. A good messy bun takes two minutes to build and saves twenty minutes of worry, so learn one, wear it often, and let it be the easy updo you reach for again and again. Keep your pins, your spray, and your favourite scrunchie in one small bag, so your messy bun kit is always ready.
Related: Hairstyle Ideas | Long Hair Ideas